ラベル pcl の投稿を表示しています。 すべての投稿を表示

2011年9月8日木曜日

ROS Electricのインストール(PCL1.1との共存)

さそっくelectricをインストールしようとしたのですが、依存関係が満たせないとのエラーになりました。(PCL1.1をスタンドアロンで入れたUbuntu 10.04で、ROS diamondbackが入った状態です。)

しぼっていくと以下のエラーが原因のようです。

依存: libeigen3-dev (= 3.0.1-1+ros4~lucid) しかし、3.0.2-1lucid3 はインストールされようとしています


これはスタンドアローンのPCLとの競合が原因のようです。
まずPCLを削除します。(ROS側で同じバージョンの1.1が入るので削除してもいい??でしょう)

$ sudo apt-get remove libpcl-1.1 libeigen3-dev

次に以下のファイルを削除するか、拡張子を変更するか、中身を"#"でコメントアウトします。
/etc/apt/sources.list.d/v-launchpad-jochen-sprickerhof-de-pcl-lucid.list

そして
$ sudo apt-get update
$ sudo apt-get install ros-electric-desktop-full

で入るはずです。
競合してしまうのは非常に残念ですね。

2011年8月25日木曜日

Point Cloud Libraryを試す(その5:ユークリッドクラスター抽出)

いい加減PCLも飽きてきましたが、これもやっちゃいましょう。
クラスタリングです。
画像処理でもラベリングは結構使うと思います。
それの3D版です。

Euclidean Cluster Extraction
http://pointclouds.org/documentation/tutorials/cluster_extraction.php#cluster-extraction

こちらのチュートリアルのほうがシンプルですが、私は可視化したかったので↓のように少し改造してビューワを付けました。


$ wget http://dev.pointclouds.org/attachments/download/157/table_scene_lms400.pcd


して、以下をcluster_extraction.cppとして保存です。


#include <pcl/ModelCoefficients.h>
#include <pcl/point_types.h>
#include <pcl/io/pcd_io.h>
#include <pcl/features/normal_3d.h>
#include <pcl/filters/extract_indices.h>
#include <pcl/filters/voxel_grid.h>
#include <pcl/kdtree/kdtree.h>
#include <pcl/sample_consensus/method_types.h>
#include <pcl/sample_consensus/model_types.h>
#include <pcl/segmentation/sac_segmentation.h>
#include <pcl/segmentation/extract_clusters.h>
#include <pcl/visualization/cloud_viewer.h>


int
main (int argc, char** argv)
{
  // Read in the cloud data
  pcl::PCDReader reader;
  pcl::PointCloud<pcl::PointXYZ>::Ptr cloud (new pcl::PointCloud<pcl::PointXYZ>);
  reader.read ("table_scene_lms400.pcd", *cloud);
  std::cout << "PointCloud before filtering has: " << cloud->points.size () << " data points." << std::endl; //*

  // Create the filtering object: downsample the dataset using a leaf size of 1cm
  pcl::VoxelGrid<pcl::PointXYZ> vg;
  pcl::PointCloud<pcl::PointXYZ>::Ptr cloud_filtered (new pcl::PointCloud<pcl::PointXYZ>);
  vg.setInputCloud (cloud);
  vg.setLeafSize (0.01, 0.01, 0.01);
  vg.filter (*cloud_filtered);
  std::cout << "PointCloud after filtering has: " << cloud_filtered->points.size ()  << " data points." << std::endl; //*

  // Create the segmentation object for the planar model and set all the parameters
  pcl::SACSegmentation<pcl::PointXYZ> seg;
  pcl::PointIndices::Ptr inliers (new pcl::PointIndices);
  pcl::ModelCoefficients::Ptr coefficients (new pcl::ModelCoefficients);
  pcl::PointCloud<pcl::PointXYZ>::Ptr cloud_plane (new pcl::PointCloud<pcl::PointXYZ> ());
  pcl::PCDWriter writer;
  seg.setOptimizeCoefficients (true);
  seg.setModelType (pcl::SACMODEL_PLANE);
  seg.setMethodType (pcl::SAC_RANSAC);
  seg.setMaxIterations (100);
  seg.setDistanceThreshold (0.02);

  int i=0, nr_points = cloud_filtered->points.size ();
  while (cloud_filtered->points.size () > 0.3 * nr_points)
    {
      // Segment the largest planar component from the remaining cloud
      seg.setInputCloud(cloud_filtered);
      seg.segment (*inliers, *coefficients); //*
      if (inliers->indices.size () == 0)
	{
	  std::cout << "Could not estimate a planar model for the given dataset." << std::endl;
	  break;
	}

      // Extract the planar inliers from the input cloud
      pcl::ExtractIndices<pcl::PointXYZ> extract;
      extract.setInputCloud (cloud_filtered);
      extract.setIndices (inliers);
      extract.setNegative (false);

      // Write the planar inliers to disk
      extract.filter (*cloud_plane); //*
      std::cout << "PointCloud representing the planar component: " << cloud_plane->points.size () << " data points." << std::endl;

      // Remove the planar inliers, extract the rest
      extract.setNegative (true);
      extract.filter (*cloud_filtered); //*
    }

  // Creating the KdTree object for the search method of the extraction
  pcl::KdTree<pcl::PointXYZ>::Ptr tree (new pcl::KdTreeFLANN<pcl::PointXYZ>);
  tree->setInputCloud (cloud_filtered);

  std::vector<pcl::PointIndices> cluster_indices;
  pcl::EuclideanClusterExtraction<pcl::PointXYZ> ec;
  ec.setClusterTolerance (0.02); // 2cm
  ec.setMinClusterSize (100);
  ec.setMaxClusterSize (25000);
  ec.setSearchMethod (tree);
  ec.setInputCloud( cloud_filtered);
  ec.extract (cluster_indices);

  int j = 0;
  float colors[6][3] ={{255, 0, 0}, {0,255,0}, {0,0,255}, {255,255,0}, {0,255,255}, {255,0,255}};
  pcl::visualization::CloudViewer viewer("cluster viewer");
  pcl::PointCloud<pcl::PointXYZRGB>::Ptr cloud_cluster(new pcl::PointCloud<pcl::PointXYZRGB>);
  pcl::copyPointCloud(*cloud_filtered, *cloud_cluster);
  for (std::vector<pcl::PointIndices>::const_iterator it = cluster_indices.begin (); it != cluster_indices.end (); ++it)
    {
      for (std::vector<int>::const_iterator pit = it->indices.begin (); pit != it->indices.end (); pit++) {
	cloud_cluster->points[*pit].r = colors[j%6][0];
	cloud_cluster->points[*pit].g = colors[j%6][1];
	cloud_cluster->points[*pit].b = colors[j%6][2];
      }
      std::cout << "PointCloud representing the Cluster: " << cloud_cluster->points.size () << " data points." << std::endl;
      std::stringstream ss;
      ss << "cloud_cluster_" << j << ".pcd";
      writer.write<pcl::PointXYZRGB> (ss.str (), *cloud_cluster, false); //*
      j++;
    }
  viewer.showCloud (cloud_cluster); 
  while (!viewer.wasStopped())
    {
      sleep (1);
    }


  return (0);
}

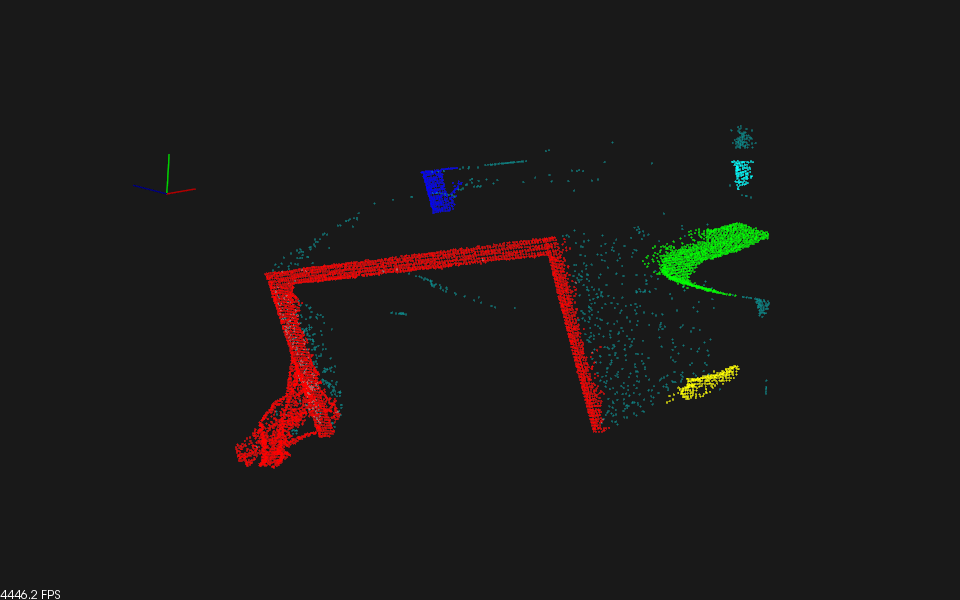
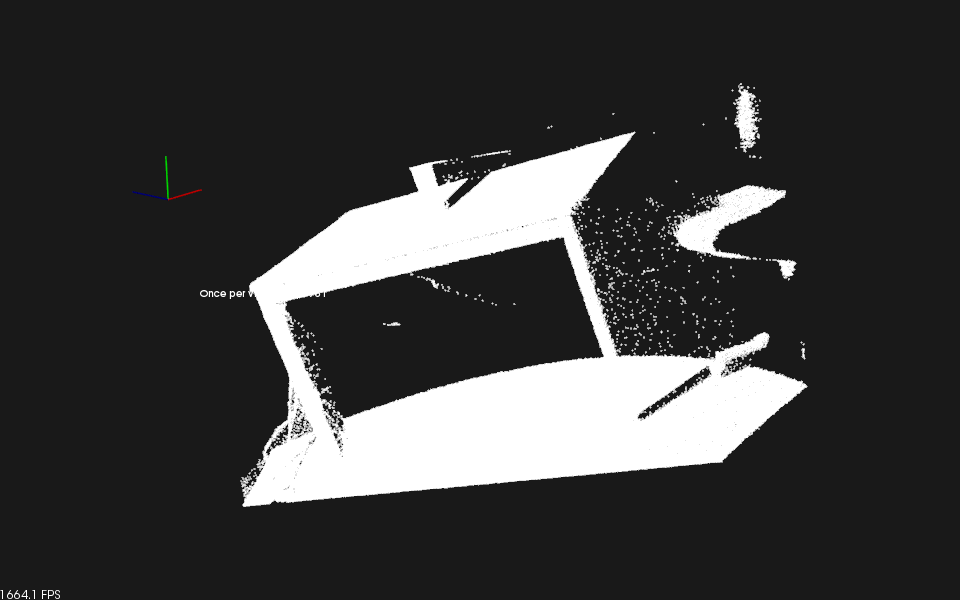
するとこんな感じです。


ちなみに元データはこんな感じ。テーブル上面と床が削除されています。


少しだけコードを読むと、
最初にポイントクラウドをファイルから読み込み、pcl::VexelGridを使ってダウンサンプリングしています。
ダウンサンプリングのチュートリアルもありますが簡単なので飛ばしました。
setLeafSizeで10mm刻みのグリッドでサンプリングしていますね。

次に前回やった平面検出で平面を削除しています。
複数の平面検出をどうやるのかと思ったら、検出した領域を削除して、削除したもに対してもう一度検出することでやっているみたいです。
while(...)のところです。

で、今回のキモはpcl::KdTreeを使ってEuclideanClusterEtractionしているところです。
setClusterToleranceでマージする最大距離を指定して、最小、最大のパーティクル数を指定しているようです。

CMakeListx.txtはいつもと同じです。


cmake_minimum_required(VERSION 2.8 FATAL_ERROR)

project(cluster_extraction)

find_package(PCL 1.1 REQUIRED)

include_directories(${PCL_INCLUDE_DIRS})
link_directories(${PCL_LIBRARY_DIRS})
add_definitions(${PCL_DEFINITIONS})

add_executable (cluster_extraction cluster_extraction.cpp)
target_link_libraries (cluster_extraction ${PCL_LIBRARIES})

ここまでで、机の上にある物体をラベリングして認識することができるようになりました。
あとはフィルタのチュートリアルでもやればひと通り終わりかな?

大体感じはつかめたのでPCL本体はこれくらいにしておきましょう。

これで少しは面白いことができるかもしれません。

次はROSとのからみを見てみます。

2011年8月24日水曜日

Point Cloud Libraryを試す(その4:平面抽出)

今回はポイントクラウドから平面を抽出します。

その前に、前回使ったPointXYZRGBの色の部分がfloat rgbとなっていて気になったので調べてみました。

// pack r/g/b into rgb
 uint8_t r = 255, g = 0, b = 0;    // Example: Red color
 uint32_t rgb = ((uint32_t)r << 16 | (uint32_t)g << 8 | (uint32_t)b);
 p.rgb = *reinterpret_cast<float*>(&rgb);
↑のような感じで使うみたいです。
悪名高きreinterpret_castか!と思ったら、
ver.1.1.0からはr,g,b変数も使えるみたいで、
point.r = 255;
point.g = 100;
point.b = 10;

みたいに指定できるようです。


PCLのAPIリファレンスはこちらです。
Point Cloud Library (PCL): PCL API Documentation

という小ネタを挟みまして、今回は平面検出です。

↓のようにPointCloudから平面っぽいところを切りだしてくれるはずです。

チュートリアルはこちら

チュートリアルにあるコードは簡単なんですが、ビューワが付いていないので、ビューワを付けてみました。
以下をplanar_segmentation.cppとして保存してください。

#include <iostream>
#include <pcl/ModelCoefficients.h>
#include <pcl/io/pcd_io.h>
#include <pcl/point_types.h>
#include <pcl/sample_consensus/method_types.h>
#include <pcl/sample_consensus/model_types.h>
#include <pcl/segmentation/sac_segmentation.h>
#include <pcl/visualization/cloud_viewer.h>

int
main (int argc, char** argv)
{
  pcl::PointCloud<pcl::PointXYZRGB> cloud;

  // Fill in the cloud data
  cloud.width  = 15;
  cloud.height = 10;
  cloud.points.resize (cloud.width * cloud.height);

  // Generate the data
  size_t i;
  for (i = 0; i < cloud.points.size ()/2; ++i)
    {
      // 平面におく
      cloud.points[i].x = 1024 * rand () / (RAND_MAX + 1.0);
      cloud.points[i].y = 1024 * rand () / (RAND_MAX + 1.0);
      cloud.points[i].z = 0.1 * rand () / (RAND_MAX + 1.0);
      cloud.points[i].r = 255;
      cloud.points[i].g = 255;
      cloud.points[i].b = 255;
    }

  for (; i < cloud.points.size (); ++i)
    {
      // ちらばらせる
      cloud.points[i].x = 1024 * rand () / (RAND_MAX + 1.0);
      cloud.points[i].y = 1024 * rand () / (RAND_MAX + 1.0);
      cloud.points[i].z = 1024 * rand () / (RAND_MAX + 1.0);
      cloud.points[i].r = 255;
      cloud.points[i].g = 255;
      cloud.points[i].b = 255;
    }

  // Set a few outliers
  cloud.points[0].z = 2.0;
  cloud.points[3].z = -2.0;
  cloud.points[6].z = 4.0;

  std::cerr << "Point cloud data: " << cloud.points.size () << " points" << std::endl;
  for (size_t i = 0; i < cloud.points.size (); ++i)
    std::cerr << "    " << cloud.points[i].x << " "
     << cloud.points[i].y << " "
     << cloud.points[i].z << std::endl;

  pcl::ModelCoefficients::Ptr coefficients (new pcl::ModelCoefficients);
  pcl::PointIndices::Ptr inliers (new pcl::PointIndices);
  // Create the segmentation object
  pcl::SACSegmentation<pcl::PointXYZRGB> seg;
  // Optional
  seg.setOptimizeCoefficients (true);
  // Mandatory
  seg.setModelType (pcl::SACMODEL_PLANE);
  seg.setMethodType (pcl::SAC_RANSAC);
  seg.setDistanceThreshold (0.1);

  seg.setInputCloud (cloud.makeShared ());
  seg.segment (*inliers, *coefficients);

  if (inliers->indices.size () == 0)
    {
      PCL_ERROR ("Could not estimate a planar model for the given dataset.");
      return (-1);
    }

  std::cerr << "Model coefficients: " << coefficients->values[0] << " "
   << coefficients->values[1] << " "
   << coefficients->values[2] << " "
   << coefficients->values[3] << std::endl;

  std::cerr << "Model inliers: " << inliers->indices.size () << std::endl;
  for (size_t i = 0; i < inliers->indices.size (); ++i) {
    std::cerr << inliers->indices[i] << "    " << cloud.points[inliers->indices[i]].x << " "
     << cloud.points[inliers->indices[i]].y << " "
     << cloud.points[inliers->indices[i]].z << std::endl;
    cloud.points[inliers->indices[i]].r = 255;
    cloud.points[inliers->indices[i]].g = 0;
    cloud.points[inliers->indices[i]].b = 0;
  }
  pcl::visualization::CloudViewer viewer("Cloud Viewer");

  viewer.showCloud(cloud.makeShared());

  while (!viewer.wasStopped ())
    {
     
    }

  return (0);
}
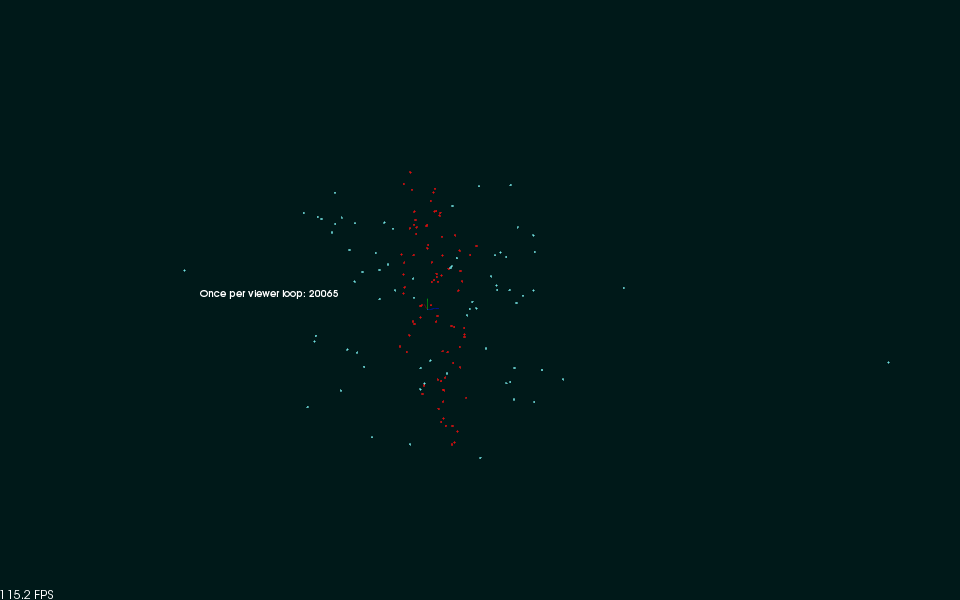
するとこんな感じで平面っぽいところにあるポイントが赤く表示されました。

CMakeLists.txtはいつもと同じです。

cmake_minimum_required(VERSION 2.8 FATAL_ERROR)

project(planar_segmentation)

find_package(PCL 1.1 REQUIRED)

include_directories(${PCL_INCLUDE_DIRS})
link_directories(${PCL_LIBRARY_DIRS})
add_definitions(${PCL_DEFINITIONS})

add_executable (planar_segmentation planar_segmentation.cpp)
target_link_libraries (planar_segmentation ${PCL_LIBRARIES})
$ cmake .
$ make
でビルドして、
$ ./planar_segmentation
で実行してみます。


SACSegmentationというClassが今回の本質のようです。ここにSACMODEL_PLANE=平面モデルを指定したり、
setDistanceThresholdでモデルとの誤差の閾値を指定しています。setMethodTypeで計算方法を選択(今回はSAC_RANSAC)しています。RANSACは確率的なモデル推定だったきがします。
coefficients->valuesに入っているのは推定されたモデル
ax+by+cz+d=0の平面の式になります。

これで平面上にあるポイントが検出できました。

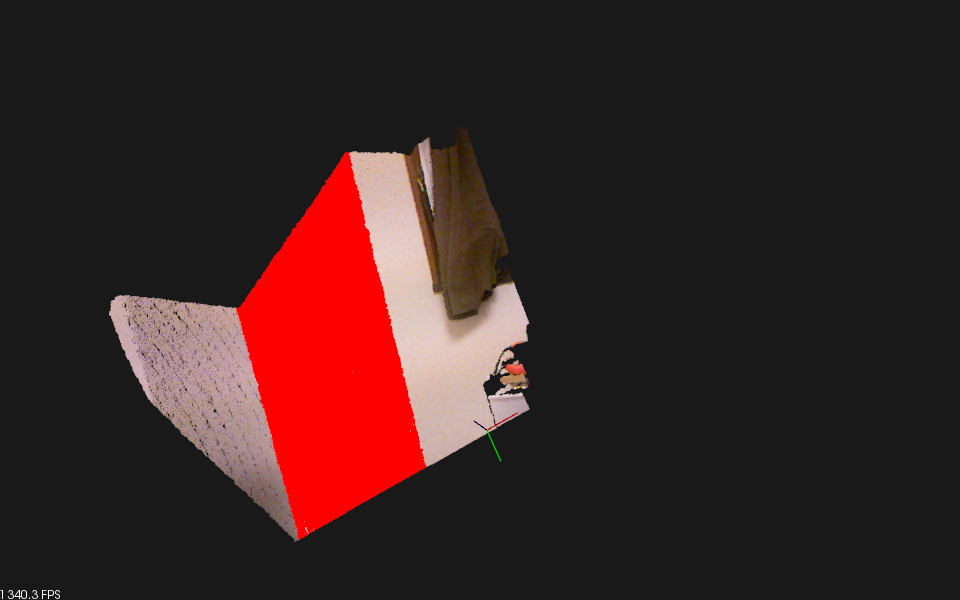
さらにKinectでやってみました。前回のKinectのキャプチャサンプルに今回のを合体させてみました。
一番広い平面が真っ赤にそまります。これは楽しい!

一応ソースコードです。適当です。
#include <iostream>
#include <pcl/ModelCoefficients.h>
#include <pcl/io/openni_grabber.h>
#include <pcl/io/pcd_io.h>
#include <pcl/point_types.h>
#include <pcl/sample_consensus/method_types.h>
#include <pcl/sample_consensus/model_types.h>
#include <pcl/segmentation/sac_segmentation.h>
#include <pcl/visualization/cloud_viewer.h>

void segmentate(pcl::PointCloud<pcl::PointXYZRGB>& cloud, double threshould) {
  pcl::ModelCoefficients::Ptr coefficients (new pcl::ModelCoefficients);
  pcl::PointIndices::Ptr inliers (new pcl::PointIndices);
  // Create the segmentation object
  pcl::SACSegmentation<pcl::PointXYZRGB> seg;
  // Optional
  seg.setOptimizeCoefficients (true);
  // Mandatory
  seg.setModelType (pcl::SACMODEL_PLANE);
  seg.setMethodType (pcl::SAC_RANSAC);
  seg.setDistanceThreshold (threshould);

  seg.setInputCloud (cloud.makeShared ());
  seg.segment (*inliers, *coefficients);

  for (size_t i = 0; i < inliers->indices.size (); ++i) {
    cloud.points[inliers->indices[i]].r = 255;
    cloud.points[inliers->indices[i]].g = 0;
    cloud.points[inliers->indices[i]].b = 0;
  }
}

 class SimpleOpenNIViewer
 {
   public:
     SimpleOpenNIViewer () : viewer ("PCL OpenNI Viewer") {}

     void cloud_cb_ (const pcl::PointCloud<pcl::PointXYZRGB>::ConstPtr &cloud)
     {
       if (!viewer.wasStopped()) {
  pcl::PointCloud<pcl::PointXYZRGB> segmented_cloud(*cloud);
  segmentate(segmented_cloud, 0.01);
         viewer.showCloud (segmented_cloud.makeShared());
       }
     }

     void run ()
     {
       pcl::Grabber* interface = new pcl::OpenNIGrabber();

       boost::function<void (const pcl::PointCloud<pcl::PointXYZRGB>::ConstPtr&)> f =
         boost::bind (&SimpleOpenNIViewer::cloud_cb_, this, _1);

       interface->registerCallback (f);
       interface->start ();
       while (!viewer.wasStopped())
       {
         sleep (1);
       }

       interface->stop ();
     }

     pcl::visualization::CloudViewer viewer;
 };

 int main ()
 {
   SimpleOpenNIViewer v;
   v.run ();
   return 0;
 }

2011年8月22日月曜日

Point Cloud Libraryを試す(その3:Kinectからデータ取得)

いよいよKinectを使ってデータを取得してみます。
http://pointclouds.org/documentation/tutorials/openni_grabber.php#openni-grabber

データが取得できれば、これまでやった、ファイルへの保存、ビューワでの表示、がとりあえずできるようになるわけです。
公式のサンプルコードは動かないので↓のように修正しました。

#include <pcl/io/openni_grabber.h>
#include <pcl/visualization/cloud_viewer.h>

 class SimpleOpenNIViewer
 {
   public:
     SimpleOpenNIViewer () : viewer ("PCL OpenNI Viewer") {}

     void cloud_cb_ (const pcl::PointCloud<pcl::PointXYZRGB>::ConstPtr &cloud)
     {
       if (!viewer.wasStopped())
         viewer.showCloud (cloud);
     }

     void run ()
     {
       pcl::Grabber* interface = new pcl::OpenNIGrabber();

       boost::function<void (const pcl::PointCloud<pcl::PointXYZRGB>::ConstPtr&)> f =
         boost::bind (&SimpleOpenNIViewer::cloud_cb_, this, _1);

       interface->registerCallback (f);

       interface->start ();

       while (!viewer.wasStopped())
       {
         sleep (1);
       }

       interface->stop ();
     }

     pcl::visualization::CloudViewer viewer;
 };

 int main ()
 {
   SimpleOpenNIViewer v;
   v.run ();
   return 0;
 }

ビューワで表示されます。


さらに
#include<pcl/io/pcd_io.h>
して、cloud_cb_の中に
pcl::io::savePCDFileBinary("kinect.pcd", *cloud);
を追加すればファイルに保存もできますね。
マイフレーム保存してもけっこう軽いです。

次回は平面抽出をやります。

2011年8月21日日曜日

Point Cloud Libraryを試す(その2:ビューワ編)

前回ファイルの書き込みをしました。
今回は読み込みを飛ばして可視化をします。
可視化できないと何をやっているのかさっぱりなので。

http://pointclouds.org/documentation/tutorials/cloud_viewer.php#cloud-viewer


前回のコードを少し書き換えて、ビューワのコードをいれてみました。

#include <iostream>
#include <pcl/io/pcd_io.h>
#include <pcl/point_types.h>
#include <pcl/visualization/cloud_viewer.h> // 追加

int
  main (int argc, char** argv)
{
  pcl::PointCloud<pcl::PointXYZ> cloud;
  
  // Fill in the cloud data
  cloud.width    = 5;
  cloud.height   = 1;
  cloud.is_dense = false;
  cloud.points.resize (cloud.width * cloud.height);

  for (size_t i = 0; i < cloud.points.size (); ++i)
  {
    cloud.points[i].x = 1024 * rand () / (RAND_MAX + 1.0);
    cloud.points[i].y = 1024 * rand () / (RAND_MAX + 1.0);
    cloud.points[i].z = 1024 * rand () / (RAND_MAX + 1.0);
  }
  // 追加
  pcl::visualization::CloudViewer viewer ("Simple Cloud Viewer");
  viewer.showCloud (cloud.makeShared());
  while (!viewer.wasStopped ()) {
  }

  return (0);
}


CMakeLists.txtは以下のような感じ。

cmake_minimum_required(VERSION 2.8 FATAL_ERROR)

project(pcd_write)

find_package(PCL 1.1 REQUIRED)

include_directories(${PCL_INCLUDE_DIRS})
link_directories(${PCL_LIBRARY_DIRS})
add_definitions(${PCL_DEFINITIONS})

add_executable (pcd_write pcd_write.cpp)
add_executable (pcl_view_test pcl_view_test.cpp)

target_link_libraries (pcd_write ${PCL_COMMON_LIBRARIES} ${PCL_IO_LIBRARIES})
target_link_libraries (pcl_view_test ${PCL_LIBRARIES})

$ ./pcl_view_test
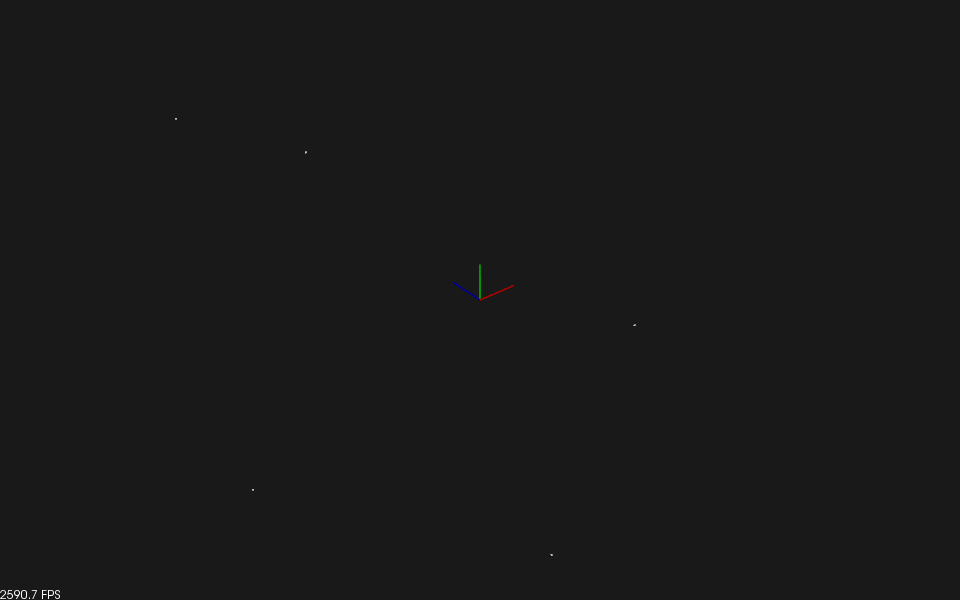
とすると以下のようなビューワが立ち上がります。
マウスを駆使してうまく表示します。ホイールで縮小するとよさそうです。


見えないでしょうがちっちゃい5つの白い点が作成したポイントクラウドです。

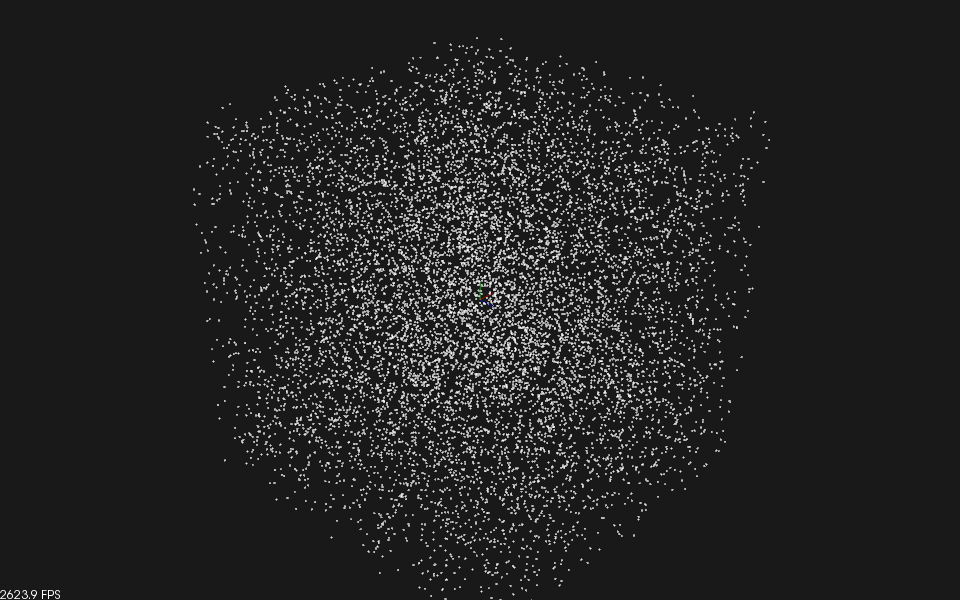
ためしに点を100x100くらいにしてみます。widthとheightを100にしてみます。

おー、ポイントクラウドって感じですね。

公式のチュートリアルはこちらです。
もう少し詳しいので必要になったら参照したいと思います。
http://pointclouds.org/documentation/tutorials/cloud_viewer.php#cloud-viewer

2011年8月20日土曜日

Point Cloud Libraryを試す(その1:インストール&コンパイルテスト編)

ROSを使わない前提でのインストールを説明します。

(ROSでのPCLのインストールは簡単です。
$ sudo apt-get install ros-diamondback-point-cloud-perception
だけ。ROSでは/usr/とかにインストールしないので、以下のインストール方法と競合はしません。)

相変わらず環境はUbuntu 10.04です。
http://pointclouds.org/downloads/linux.html


sudo add-apt-repository ppa:v-launchpad-jochen-sprickerhof-de/pcl
sudo apt-get update
sudo apt-get install libpcl-1.1-dev

以上でおしまいです。
簡単ですね。

ではまずこれをやります。

Writing Point Cloud data to PCD files (ポイントクラウドデータをPCDファイルに書きこむ)

まず以下の内容をpcd_write.cppというファイル名で保存します。


#include <iostream>
#include <pcl/io/pcd_io.h>
#include <pcl/point_types.h>

int
  main (int argc, char** argv)
{
  pcl::PointCloud<pcl::PointXYZ> cloud;

  // Fill in the cloud data
  cloud.width    = 5;
  cloud.height   = 1;
  cloud.is_dense = false;
  cloud.points.resize (cloud.width * cloud.height);

  for (size_t i = 0; i < cloud.points.size (); ++i)
  {
    cloud.points[i].x = 1024 * rand () / (RAND_MAX + 1.0);
    cloud.points[i].y = 1024 * rand () / (RAND_MAX + 1.0);
    cloud.points[i].z = 1024 * rand () / (RAND_MAX + 1.0);
  }

  pcl::io::savePCDFileASCII ("test_pcd.pcd", cloud);
  std::cerr << "Saved " << cloud.points.size () << " data points to test_pcd.pcd." << std::endl;

  for (size_t i = 0; i < cloud.points.size (); ++i)
    std::cerr << "    " << cloud.points[i].x << " " << cloud.points[i].y << " " << cloud.points[i].z << std::endl;

  return (0);
}


で、次のようなCMakeLists.txtを作成します。


cmake_minimum_required(VERSION 2.8 FATAL_ERROR)

project(pcd_write)

find_package(PCL 1.1 REQUIRED)

include_directories(${PCL_INCLUDE_DIRS})
link_directories(${PCL_LIBRARY_DIRS})
add_definitions(${PCL_DEFINITIONS})

add_executable (pcd_write pcd_write.cpp)
target_link_libraries (pcd_write ${PCL_COMMON_LIBRARIES} ${PCL_IO_LIBRARIES})


$ cmake .
$ make
とするとpcd_writeという実行ファイルができるはずです。
$ ./pcd_write
して、以下のように表示されればOK

$ ./pcd_write
Saved 5 data points to test_pcd.pcd.
    0.352222 -0.151883 -0.106395
    -0.397406 -0.473106 0.292602
    -0.731898 0.667105 0.441304
    -0.734766 0.854581 -0.0361733
    -0.4607 -0.277468 -0.916762

test_pcd.pcdというファイルができているはずです。
中身は

# .PCD v.7 - Point Cloud Data file format
VERSION .7
FIELDS x y z
SIZE 4 4 4
TYPE F F F
COUNT 1 1 1
WIDTH 5
HEIGHT 1
VIEWPOINT 0 0 0 1 0 0 0
POINTS 5
DATA ascii
0.35222197 -0.15188313 -0.10639524
-0.3974061 -0.47310591 0.29260206
-0.73189831 0.66710472 0.44130373
-0.73476553 0.85458088 -0.036173344
-0.46070004 -0.2774682 -0.91676188
のようになっています。

pcl::PointXYZの定義は

// \brief A point structure representing Euclidean xyz coordinates.
struct PointXYZ
{
  float x;
  float y;
  float z;
};
となっています。
たんなる3次元座標ですね。この他にも色情報を含んだPointXYZRGBなど、さまざまなタイプがpcl/point_types.hに定義されています。

pcl::PointCloudクラスはwidthやheightを持ちます。これは画像のアナロジーになっているみたいです。
Kinectでは距離画像(画素が距離情報の画像)を取れるので親和性が高いのでしょう。

is_denseはTrueの場合にNaNやInfが値として入っていないことを保証するようです。

あとstd_msgs::Header型のheaderという変数も持ちます。これはROSのものと同じ型です。
ROSに依存していないのになぜこれが使えるかというと、
/usr/include/pcl-1.1/の下にstd_msgsとsensor_msgsがインストールされているからです。
非常に気持ち悪いですね。

あとは
pcl::io::savePCDFileASCII関数でファイルに出力しています。非常に簡単ですね。

2011年8月19日金曜日

Point Cloud Libraryを試す(その0)

かなり遅くなりましたが今後このブログでPoint Cloud Library (PCL)を試したいと思います。

PCLはKinectやレーザーレンジファインダで獲得できる3次元の点群を使った認識を行うためのライブラリです。(たぶん)
(including filtering, feature estimation, surface reconstruction, registration, model fitting and segmentation)とあります。


HPを見るとスポンサーとして、intel, nvidia, willowなどが並び、日本でも産総研、東大、トヨタが付いているようですね。


私はPCLはかなり前から注目していましたが、正直何に使っていいか分かりませんでした。
Kinectが発売され、誰でも使えるようになり、さらに注目度が増していたわけですが、
やはりどうロボットにいれていいかわからず手がでませんでした。
6軸以上のアームがあれば物体認識に使えるんでしょうけど、
そんなもの持っていませんし、作るにもお金とスキルと時間が必要です。

また、なんとか私が持っているロボット(移動台車、Kinect、2軸アーム)での利用法をさがそうとしていましたが、
やはり思いつきませんでした。
(1つ考えていますが、あまり面白くないです。誰かネタがあったら教えてください。)

でも勉強していくうちに思いつくかもしれない、と思って見切り発車でやっていこうと思います。

PCLはROS依存とROS依存じゃないところをちゃんと意識して作っているっぽいので、ROSじ
ゃない方面からやるか、ROSでやるか、という2つのやり方があると思います。
ドキュメントの再利用性を考えて、ROS非依存で進めて、最後にROSからだとこうなる、という感じで進めようかと思います。
最後にルンバにKinectを載せてなんかやるでしょう。

ではでは。

2010年12月4日土曜日

pcl(unstable)のインストール

pcl (point cloud library)をインストールします。
http://www.ros.org/wiki/pcl

pclは3Dのレーザーデータから物体認識するためのライブラリ(たぶん)です。
これまでそんな3Dセンサ持っていないので関係ないと思っていましたが、
Kinectのおかげでpclが使えそうな雰囲気がしてきたのでとりえあず触ってみたいと思います。

私の環境ではROSはcturtleを利用していますが、いろんなところで
cturtleのpclは古すぎて、APIも変わっているしオススメしない、という雰囲気を感じるので
なるべく新しいものを入れたいと思います。

pclを使っている@garaemonさんに聞いたところによると「まじunstableおすすめ」ということでしたので、
いれてみます。

以下のような記述をpcl.rosintallとして保存して、
$ rosinstall ros pcl.rosinstall
でソースを入手しました。


- svn:
    uri: https://code.ros.org/svn/ros-pkg/stacks/perception_pcl/tags/unstable
    local-name: perception_pcl
- svn:
    uri: https://code.ros.org/svn/ros-pkg/stacks/perception_pcl_addons/tags/unstable
    local-name: perception_pcl_addons

ROS全部makeするのめんどくさかったので、ROS本体はcturtleのまま、
pclだけunstable版でやってみます。

環境変数ROS_PACKAGES_PATHのcturtleのほうより先に、このunstable版がくるようにして、
$ roscd pcl_tutorial
$ rosmake --rosdep-install
としてみました。

試しに
$ roscd pcl_tutorial
$ cd data
$ ../bin/tutorial_narf_keypoint_extraction ./office_scene.pcd
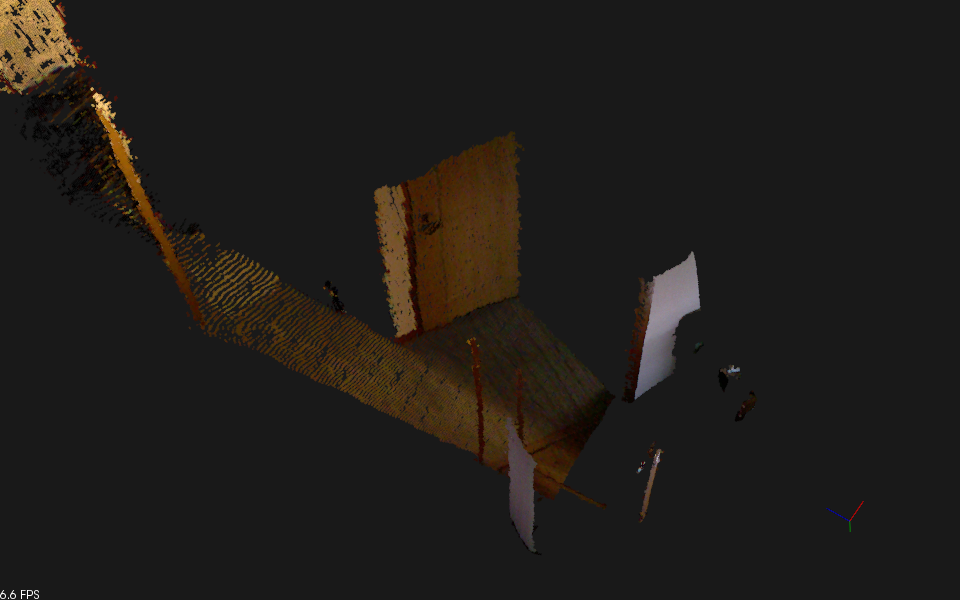
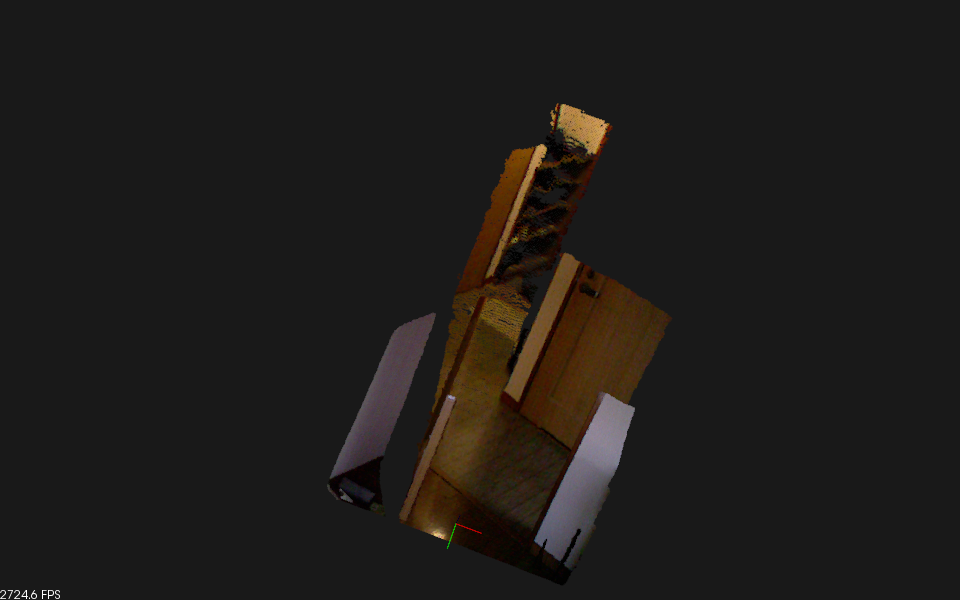
としてみると、以下のようにnarf特徴点の抽出と表示ができたようです。


早くKinectのデータで試してみたいですね。
Tutorialがあるので必要ありそうなところだけやってみたいと思います。